Customers
What is Customers?
Customers feature in Joy Wishlist allows you to track, analyze, and manage customers who interact with your wishlist functionality. This powerful tool gives you insights into customer behavior, wishlist activities, and purchasing patterns, helping you make data-driven decisions for your store.
Why use customer management?
Customer Management helps you:
- Track customer engagement with your wishlist feature
- Identify potential sales opportunities by seeing which products customers are interested in
- Understand shopping behavior between logged-in customers and guests
- Measure the effectiveness of your wishlist in driving sales
Understanding the customer table
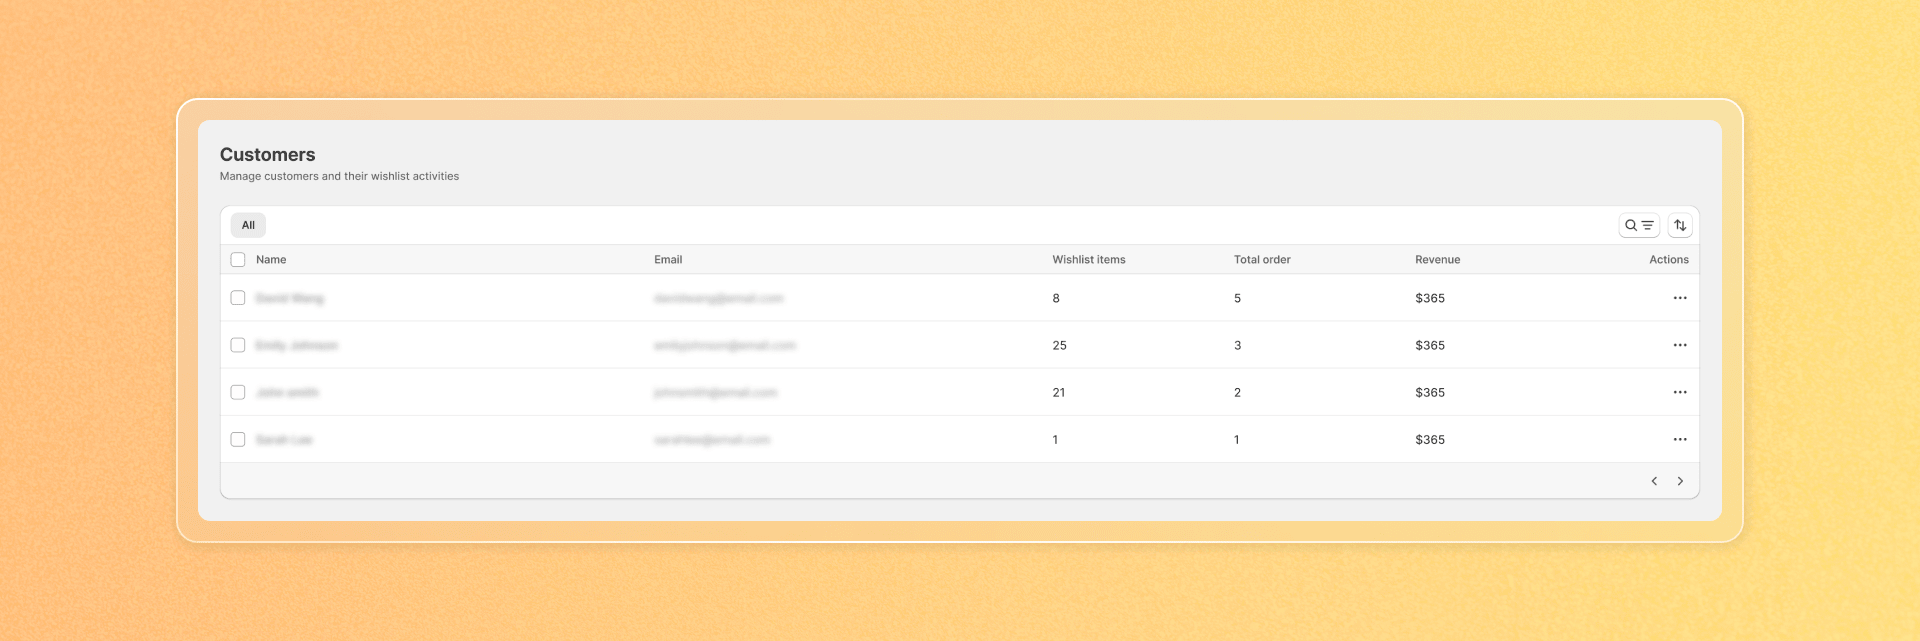
Customers data table
| Column | Description |
|---|---|
| Name | Customer's name |
| Customer's email address | |
| Wishlist items added | Number of items in the customer's wishlist |
| Total items paid | Number of orders made from wishlist items |
| Revenue | Total revenue generated from wishlist conversions |
| Actions | Options to manage each customer |
Filtering and Sorting customers
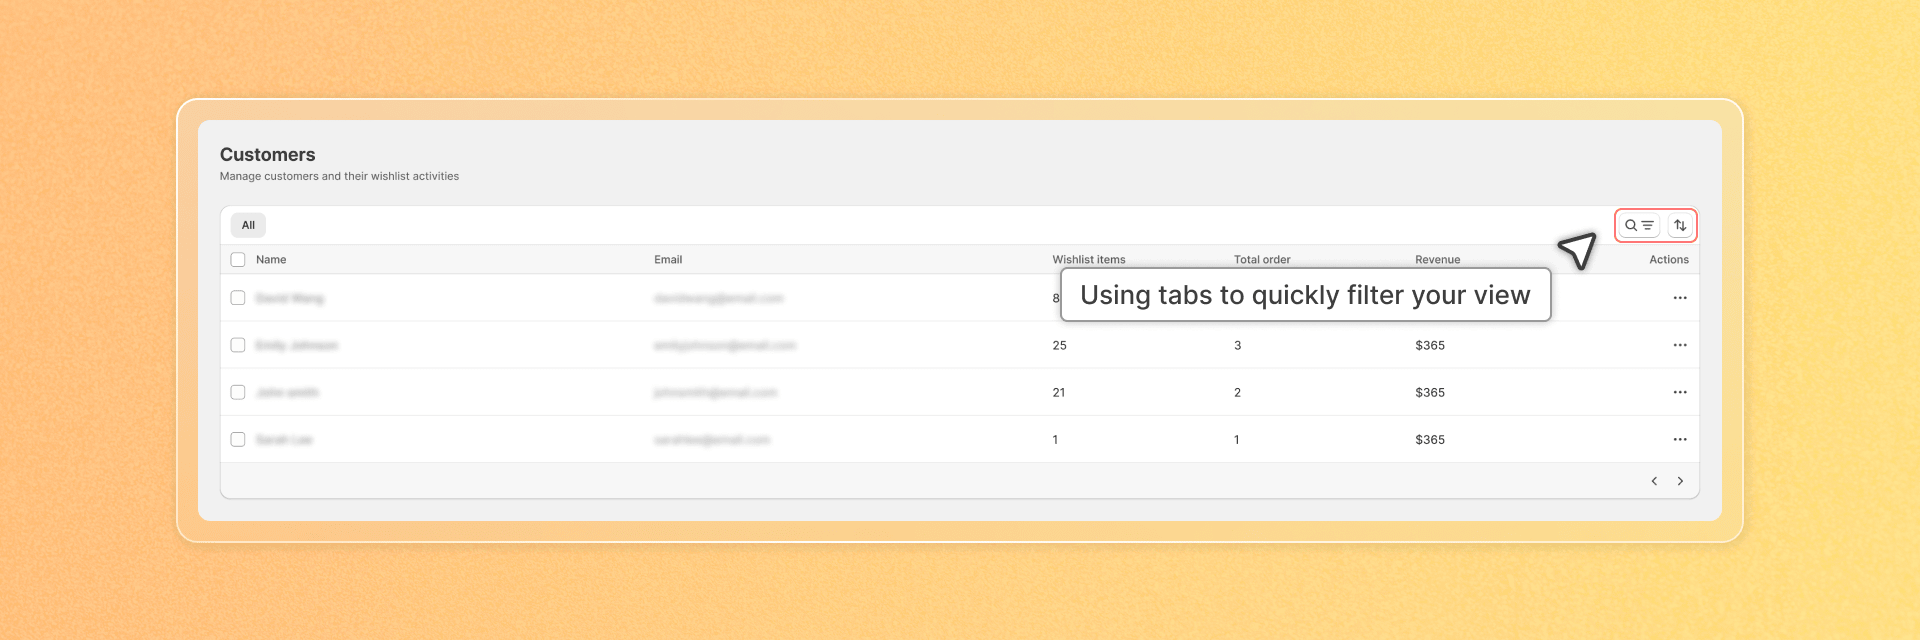
Using Filters
Click the Filter button to access additional filtering options:
- Select "Has orders" to view customers who have purchased from their wishlist
- Select "No orders" to find customers who haven't yet converted
Searching for Specific Customers
Use the Search bar to find specific customers by:
- Name
- Email address
Sorting the Customer list
Click the Sort button to order your customer list by:
- Wishlist items added (Ascending or Descending)
- Total items paid (Ascending or Descending)
- Revenue (Ascending or Descending)
Export customer wishlists
Export your wishlist customers — and the exact products they saved — as a CSV file. Use it to power retargeting campaigns (price-drop, back-in-stock, reminders) in tools like Omnisend, Klaviyo, Mailchimp, or Shopify Email.
Step 1: Open the export window
- On the Customers page, click Export CSV in the top-right corner.
- The Export customer wishlists window opens.
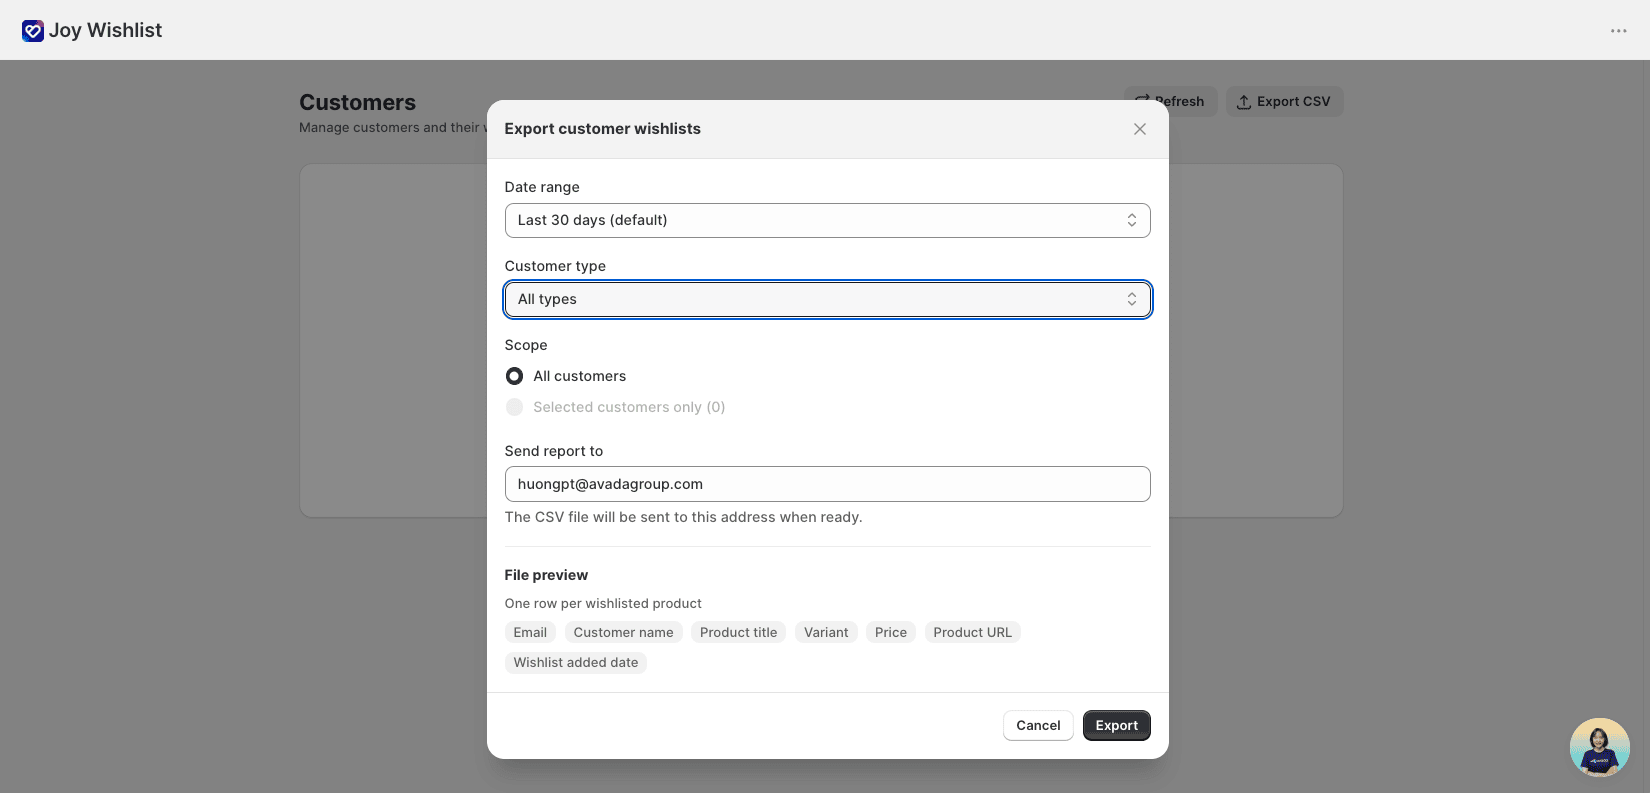
Step 2: Choose the date range
Under Date range, pick which wishlist activity to include:
- All time, Last 7 days, Last 30 days (default), or Custom range.
- For Custom range, choose a Start date and End date (the end date must be on or after the start date).
Step 3: Choose customer type and scope
- Customer type — All types, Guest, or Signed-in.
- Scope — All customers, or Selected customers only (tick rows in the customer table first to enable this option).
Step 4: Set the recipient email
- Send report to is pre-filled with your store email — change it to send the file to a teammate.
- The CSV file will be emailed to this address when it's ready.
Step 5: Review the file preview
The File preview shows the columns your file will contain, with one row per wishlisted product (a customer with 5 saved products appears on 5 rows):
| Column | Description |
|---|---|
| Customer's email address | |
| Customer name | Customer's name |
| Product title | Title of the wishlisted product |
| Variant | Product variant (blank if the product has no variants) |
| Price | Product price |
| Product URL | Link to the product |
| Wishlist added date | When the product was added to the wishlist |
Step 6: Export and download your file
- Click Export. A confirmation appears — the file is generated in the background, so you can close the window and keep working.
- When it's ready, you'll receive an email from AVADA (subject "Export List Customers") with a download link.
- Click the link to download
joy-wishlist-customers-YYYY-MM-DD.csv.
- Only one export runs at a time — wait for the current one to finish before starting another.
- The download link in the email expires after a few days, so download your file promptly.
- If nothing matches your filters, you'll receive a "No data to export" email instead.